I never really did install this logo onto my Skyline. Was afraid someone would just go steal it. I have it in a hobby box somewhere.
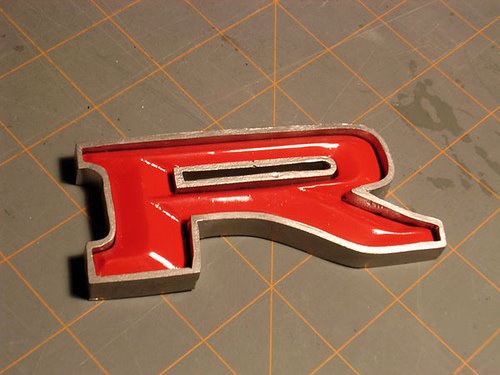
I needed a little something something to fill a big gaping hole that is my grill on the Skyline. Couldn't really use "GTR" cause the car really isn't one. (I'm not a poser) So, I just made a simple "R" that's short for R32 which is what I have. Ironically, after this project is complete, it'll be more of a GTR than anything else... even more than a stock GTR!
This was a simple and short project. (I'm posting this one up for Mabel!!)
1) Sketched out and carved the "R" onto a small piece of wood. (I used plywood here. Doesn't really matter what kind. Less porous the better. I could've easily used Sculpey to do the job) In your case, Mabel, just use the Pinky part! Whatever you want to cast.
2) Put the "R" into a small box. If the object you want to make a mold for is irregular, you may need to do 'halves'. Use plasticine for that. Just follow the factory seam line. If it's good for them, it's good for you. Don't forget the keys!!
3) Coat "R" with a releasing agent. I used a special wax specifically for resins.
4) What I used to make the molds is a 2 part Pour-a-Mold rubber compound. (Industrial Plastics and Paint). Good stuff! And they have different 'rubbery-strengths' for different apps. Softer for more deep undercuts, harder for more detail. You simply mix 50% of A into 50% of B in a small cup. Stir thoroughly! But, don't mix it so fast that the stir stick creates tiny bubbles!
5) Pour mixed solution into box. Wait.
6) When dry(I waited for 24hrs), carefully peel the mold off.
7) Coat some wax into the walls of the mold.
8) the fiberglass resin mix. The ratios are different between products! Some are like 50parts resin to 1 DROP of mekp(hardener)! Just read the instructions. And don't do it indoors!! yucky.
9) When dry, again carefully peel the cast out! Now, you should have an exact copy of the "R"!
10) Sand and paint
No comments:
Post a Comment